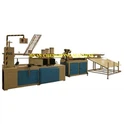
Installing a toilet paper core machine might seem like a daunting task, but with the right guidance and a systematic approach, it can be a smooth and efficient process. As a reputable supplier of toilet paper core machines, I've witnessed firsthand the transformative impact these machines can have on businesses in the paper product industry. In this blog post, I'll share a step-by-step guide on how to install a toilet paper core machine, along with some valuable tips to ensure a successful installation.
Step 1: Preparation
Before you start the installation process, it's crucial to make all the necessary preparations. This includes:
- Site Inspection: Choose a suitable location for the machine. The area should be well-ventilated, have a stable floor to support the machine's weight, and be close to a power source and water supply if required. Measure the space to ensure it can accommodate the machine's dimensions with enough room for maintenance and operation.
- Gather Tools and Materials: Collect all the tools needed for the installation, such as wrenches, screwdrivers, and pliers. Also, make sure you have the necessary safety equipment, like gloves and safety glasses. Additionally, check that all the parts of the toilet paper core machine are present and undamaged according to the packing list.
- Review the Manual: Thoroughly read the installation manual provided with the machine. The manual contains detailed instructions, diagrams, and safety information specific to your machine model. Understanding the manual will help you avoid mistakes during the installation process.
Step 2: Unpacking and Assembly
Once you've completed the preparation, it's time to unpack the machine and start the assembly:


- Unpacking: Carefully unpack the machine and its components, placing them in an organized manner. Inspect each part for any signs of damage during transit. If you find any damaged parts, contact our support team immediately for assistance.
- Base Installation: Start by installing the base of the machine. Follow the instructions in the manual to secure the base to the floor using the appropriate fasteners. Ensure that the base is level to prevent any vibrations or instability during operation.
- Component Assembly: Begin assembling the various components of the machine, such as the paper feeding system, winding mechanism, and cutting unit. Refer to the manual for the correct order of assembly and use the provided tools to tighten the bolts and screws properly. Make sure all connections are secure and aligned correctly.
Step 3: Electrical and Mechanical Connections
After assembling the machine, it's time to make the electrical and mechanical connections:
- Electrical Connections: Connect the machine to a suitable power source according to the electrical specifications provided in the manual. Ensure that the power supply meets the voltage and frequency requirements of the machine. Use proper electrical cables and connectors and follow all electrical safety regulations. It's advisable to have a qualified electrician perform the electrical connections if you're not experienced in this area.
- Mechanical Connections: Connect all the mechanical components, such as belts, chains, and gears. Check the tension of the belts and chains to ensure smooth operation. Lubricate the moving parts as recommended in the manual to reduce friction and wear.
Step 4: Testing and Calibration
Once all the connections are made, it's essential to test the machine and calibrate it for optimal performance:
- Initial Testing: Turn on the machine and perform a series of initial tests to check if all the components are functioning correctly. Listen for any unusual noises or vibrations, which could indicate a problem. Check the operation of the paper feeding system, winding mechanism, and cutting unit.
- Calibration: Calibrate the machine according to the specifications provided in the manual. This may include adjusting the speed, tension, and cutting length. Use the calibration tools and procedures outlined in the manual to ensure accurate and consistent production.
- Quality Inspection: After calibration, produce a sample of toilet paper cores and inspect them for quality. Check the diameter, wall thickness, and length of the cores to ensure they meet the required standards. Make any necessary adjustments to the machine settings if the quality is not satisfactory.
Step 5: Training and Maintenance
Finally, it's important to provide training to the operators and establish a maintenance schedule:
- Operator Training: Provide comprehensive training to the operators on how to operate the machine safely and efficiently. The training should cover topics such as machine controls, troubleshooting, and safety procedures. Our company can offer on-site training or provide training materials to ensure your operators are well-equipped to handle the machine.
- Maintenance Schedule: Establish a regular maintenance schedule for the machine. This includes cleaning, lubricating, and inspecting the machine components. Follow the maintenance guidelines provided in the manual to prevent breakdowns and extend the lifespan of the machine.
Tips for a Successful Installation
- Follow the Manual: Always refer to the installation manual provided with the machine. The manual contains valuable information specific to your machine model and will guide you through the installation process step by step.
- Seek Professional Help: If you encounter any difficulties during the installation process, don't hesitate to seek professional help. Our technical support team is available to assist you with any questions or problems you may have.
- Use Quality Parts: When replacing parts or making modifications to the machine, use only high-quality parts recommended by the manufacturer. Using inferior parts can affect the performance and reliability of the machine.
- Keep Records: Keep a record of the installation process, including any adjustments made, test results, and maintenance activities. This will help you track the machine's performance and identify any potential issues over time.
Related Machines
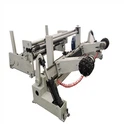
If you're interested in other types of paper core machines, we also offer a wide range of products, including Paper Tube Winding Machines, Spiral Paper Core Winder, and Parallel Paper Core Making Machine. These machines are designed to meet different production needs and can provide high-quality paper cores for various applications.
Conclusion
Installing a toilet paper core machine requires careful planning, attention to detail, and following the correct procedures. By following the steps outlined in this blog post and the instructions in the installation manual, you can ensure a successful installation and start producing high-quality toilet paper cores in no time. If you have any questions or need further assistance with the installation or operation of our toilet paper core machines, please don't hesitate to contact us. We're committed to providing you with the best products and support to help your business thrive.
References
- Manufacturer's Installation Manual for Toilet Paper Core Machine
- Industry Standards for Paper Core Machine Installation and Operation